INDEPENDENT DEALER
Manalapan Township, NJ | (732) 288-4303
OUR BLOG
Ready to master the DIY oil change? Learn how to change your car's oil with this step-by-step guide by AMSOIL Dealer - SGT. Airborne in Manalapan Township. Your engine will thank you!
Rev up your ride with AMSOIL! SGT. Airborne in Manalapan Township is your one-stop shop for premium AMSOIL products. Call them at (732) 288-4303 to talk to their experts and unlock peak performance for your car. Don't forget to stock up on essentials at AMSOIL's online store, too!
Why Regular Oil Changes Matter
Imagine your car's engine as a complex machinery ballet. Various parts rub against each other - pistons move up and down, valves open and close, etc. Engine oil controls this movement by ensuring everything moves without friction. But this oil isn't invincible. Over time, it gets dirty and loses its lubricating properties. This can lead to increased wear on the engine parts, like a dancer tripping and falling. The good news? Learning how to change your car's oil is easier than you think! This guide will walk you through the steps, save you money, and give you a cool new skill. Ready to get started? Let's dive into the steps and tips below!Before You Begin: Gathering Supplies and Safety
Let's start by prioritizing safety. Always work in a well-ventilated area and wear safety glasses and gloves to protect yourself throughout the process. Also, remember your car's owner's manual is your best friend for this project. It will tell you the specific type and amount of oil your car needs, as well as the location of the oil filter. Here are the tools you'll need:- Wrenches (socket or standard - depending on your car).
- Oil filter wrench (optional but helpful).
- Oil drain pan
- Funnel
- Rags
- Torque wrench (optional, but good for proper tightening)
AMSOIL's Signature Series 0W-20 provides superior engine protection against mechanical friction and heat. Get yours by calling SGT. Airborne in Manalapan Township at (732) 288-4303. Or, visit AMSOIL's online store for a vast selection of high-quality synthetic oils and car care supplies!
Step-by-Step Guide to Changing Your Oil
- Park and Prepare: Find a level surface, engage the parking brake, and turn off the engine.
- Ensure the Engine Is Warm(Slightly): Warmed-up oil will drain more quickly and thoroughly from the engine. But be careful, don't let it get too hot to touch!
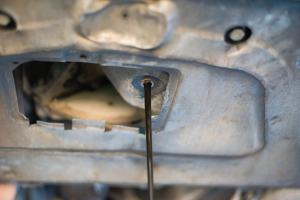
- Locate the Drain Plug and Dipstick: Refer to your owner's manual for their exact location. The drain plug is usually on the bottom of the oil pan, and the dipstick is a long, thin metal rod near the oil filler cap.
- Drain Pan and Drain Plug: Slide your oil drain pan under the drain plug. Use a wrench to loosen the plug slightly, but be prepared for oil to flow out quickly.
- Drain the Oil: Slowly remove the drain plug to allow the used oil to drain completely. Patience is key here!
- Oil Filter Removal: Find the oil filter (it may be near the drain plug or on the top of the engine). Use a filter wrench or your hand (with gloves!) to loosen and remove it. Be careful; some oil may spill out, so the drain pan is there to catch it!
- Replacing the Oil Filter: Apply a thin coat of fresh oil to the new filter's gasket. Screw it on hand-tight first, then use a wrench to tighten it further according to the manufacturer's instructions (don't overtighten!).
- Replacing the Drain Plug and Gasket: Put a new washer on the drain plug (if applicable) and screw it back in place. Use a wrench to tighten it to the specified torque following your car's manual.
- Adding New Oil: Now for the fresh stuff! Using a funnel, carefully add new oil through the filler hole. Refer to your owner's manual for the exact oil capacity. Don't overfill!
Checking the Oil Level and Finishing Up
- Check the Oil Level: Pull out the dipstick, wipe it clean, reinsert it fully, and then pull it out again to check the oil level. It should be between the minimum and maximum markings.
- Top Up (if Needed): If the oil level is low, add more oil in small quantities, then recheck the level.
- Wipe and Double-Check: Wipe away any spills and ensure there are no leaks around the drain plug and filter.
Proper Disposal of Used Oil and Filter
Don't trash it! Used oil and filters are harmful to the environment. Take them to a recycling center or auto parts store for proper disposal. Even oil rags should be disposed of responsibly – check with your local waste management for options.Feeling proud after learning how to change your car's oil? You should be! But did you know the right oil extends your car's life? SGT. Airborne in Manalapan Township offers top-tier AMSOIL products. Call them at (732) 288-4303 for expert oil recommendations. Don't forget to stock up on car care supplies at AMSOIL's online store!
CONTACT
© AMSOIL INC. 2025